Page
Use the RSP to acquire application servers
Now that you have downloaded the Red Hat IntelliJ IDE extension, installed it, and fetched then installed an RSP, you are ready to acquire your application servers.
Configure an application server
At this point, you can see what main entry points the context menu provides as a new user (Figure 6). While the option to stop the RSP is there, the ability to create a server or download a server is what’s important for this lesson.
Proceed by doing the following:
- Select Download Server (Figure 6).
Note: If you’re using WildFly or JBoss EAP, select Red Hat Server Connector. For other application servers, select Community Server Connector.Figure 6: The started RSP’s context menu.
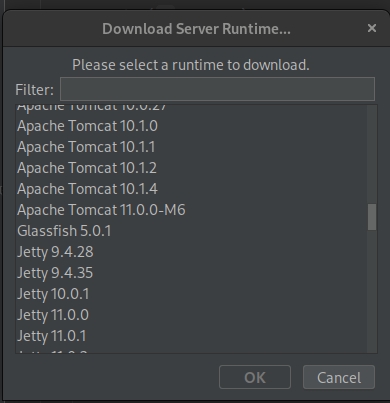
- If you select the Community Server Connector, the toolset allows you to choose which supported runtime you want to install and work with (Figure 7).
- Select the Apache Tomcat 10.1.4 instance and agree to the license agreement that pops up. The toolset will then download your chosen applications server. You can monitor the download status via a Progress Bar at the bottom of the workbench (Figure 8).
- With a fresh version of your instance installed, you will see immediate updates to the Servers view (Figure 9).
Our newly installed Apache Tomcat instance is now saved on disk with a basic / standard configuration, and the RSP is ready to control it.
Start and stop your application server
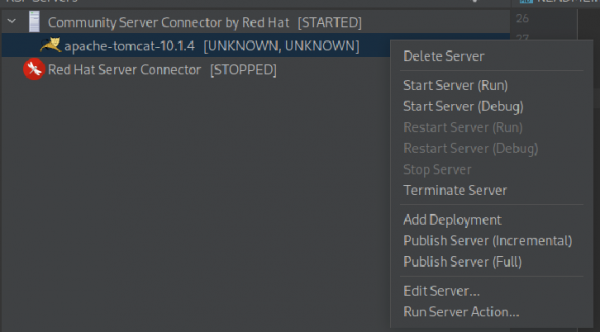
Now when you right-click on your Apache Tomcat 10.1.4 instance, the tooling gives you more options (Figure 10).
You can choose to Delete this server if you’re done testing or playing around with it, or start it in Run or Debug mode. There is a Terminate action, liberally enabled, in case the server refuses to stop and you need to kill the process. You can also Add deployments or Publish events as well as customize its launch properties and run arbitrary actions defined by the server type for your convenience.
To start the server, you have to choose between Start Server (Run) and Start Server (Debug).
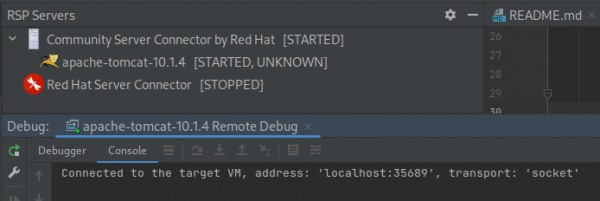
The difference between the two is that launching in Debug mode will perform two extra tasks. When starting your Tomcat instance, the launch arguments will have the appropriate Java debug flags included. Also, the toolset will make sure the IntelliJ debugger connects to the exposed port for debugging.
For the purpose of this lesson, select Start Server (Debug). Your workbench will look similar to Figure 11.
You can use a web browser to make sure the server is up (Figure 12).
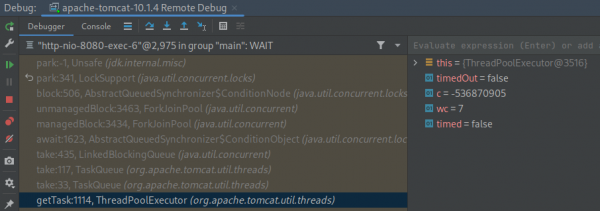
You can also pause the running process, browse different threads, and stack frames to see the server’s state (Figure 13).
Or you can choose to shut down the Tomcat instance by right-clicking the Tomcat server in your RSP Servers view and selecting Stop Server. You should be able to easily see the server shutting down in the console (Figure 14). Note: You may need to switch from the Debug tab to the Run tab.

