Page
Access the Developer Sandbox to create an application

It's time to get started. For the first lesson, you will be logging into your Developer Sandbox instance and running an application.
In order to get full benefit from taking this lesson, you need:
- A Developer Sandbox account
- The
occommand-line interface installed on your computer - A web browser
In this lesson, you will:
- Create a two-component application
- Run the application
Log into your sandbox at the command line
If you’re unsure how to do this, you can find instructions here: Access your Developer Sandbox from the command line | Red Hat Developer
Create a two-component application
Now that you’re logged in, it’s time to create an application that can be exported from your sandbox.
To do this, simply run the following command:
oc create -f https://raw.githubusercontent.com/redhat-developer-demos/ocp-demo-load/main/qotd-app-objects.yamlYou will immediately start to see the applications built under the group name
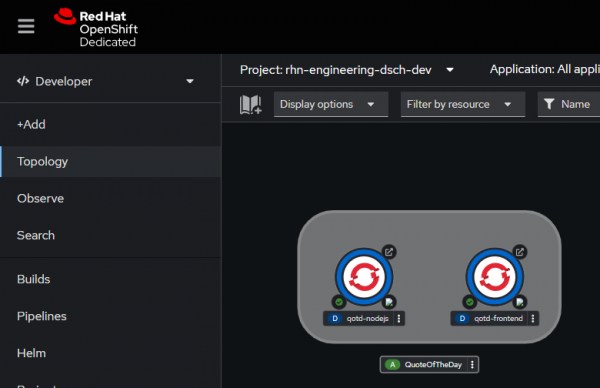
QuoteOfTheDay(Figure 1). This grouping name is important. You’ll use it later when preparing your objects to be imported into another cluster.
Figure 1: Application is finished building.
Run the application
Now that the application is built, it’s time to test it and see it working.
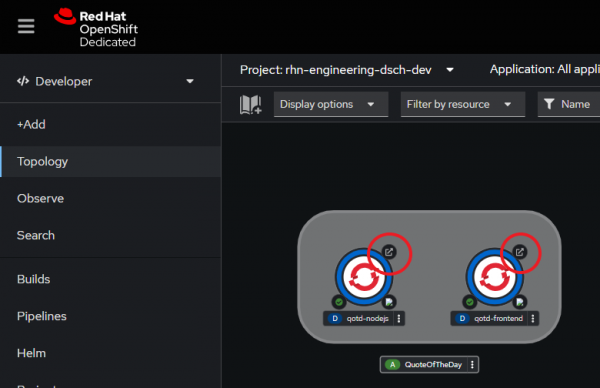
- Looking at the two applications in the dashboard, you can see that both applications have an external Route, which is a public URL by which they can be accessed.
This is evidenced by the small arrow icons in the upper right corner of each application (Figure 2).

Figure 2: Routes (external URLs) are highlighted. - The
qotd-nodejscontainer is the back-end portion of our app. This is the REST web API that supplies data to the front end. The URL for that back-end container will be copied and pasted into the front-end web page. - You can get the URL by clicking on the arrow (route) icon, or by running the following command at the command line:
(If using PowerShell):
oc get routes | select-string '^qotd-nodejs'(If using Bash):
oc get routes | grep qotd-nodejs
- Once you have the route, you will need to prefix it with the protocol
https://,append it with/quotes/random, and save that result. Here’s an example of the route and the finished URL:
qotd-nodejs-dsch-dev.apps.sandbox-m3.1530.p1.openshiftapps.com

https://qotd-nodejs-dsch-dev.apps.sandbox-m3.1530.p1.openshiftapps.com/quotes/random
Open the front-end application by clicking on its Route icon. You’ll be presented with a screen similar to Figure 3:

Figure 3: Quote of the Day web app. Click the prompt at the top to reveal the Settings page, where you will paste in your URL:

Figure 4: Enter API Server URL here. - Click Save and return to the home page. You will now be able to retrieve random quotes.
That's it for Lesson 1. You can now retrieve random quotes. Now it's time to export your application then import it to another cluster.
