In this part of the exercise, you will learn how to implement changes in the Northwind Quarkus component while interacting with the rest of the deployed application modules and services.
In order to get the full benefit from taking this lesson, you need:
In this lesson, you will:
- Learn how to implement Quarkus.
- Interact with modules and services.
- Create the Northwind component.
Live implementation on Northwind Quarkus
Eclipse JKube recently introduced a cool new feature called Remote Dev which allows you to code and debug an application while connecting to services only in the cluster. It also allows you to expose your local application to the rest of the services running in the cluster. The aim of this feature is to avoid replicating a production environment locally, especially in those scenarios where your application depends on tens or hundreds of other services. Reproducing such environments for every single developer might be costly or even impossible if you want to work with real data.
With Eclipse JKube Remote Dev, you can seamlessly replace one of the distributed application components in a staging environment with your application running locally from your IDE. This way, the rest of the services in the cluster will start interacting with your local application instead of the originally deployed one. In addition, your local application will also be able to consume those services, which makes it extremely useful in testing your application with more realistic data sets. Once you’re done, you can stop the Eclipse JKube Remote Dev session, and everything will get back to normal.
Let us now continue by exploring how we can leverage Eclipse JKube Remote Dev in this project.
Start Quarkus in development mode
We are going to make some changes in the Northwind Quarkus component. The first step is to start the application in development mode.
- Select
Terminal -> Run Task -> devfile -> 4. Start Development Mode. - During the command execution, you should ignore the prompt to open the application on port 8080. You should also ignore the prompt for port 5005 because it is used for debugging purposes.
Now that the Quarkus application is ready, we can continue by starting the Eclipse JKube remote development session (Figure 1).
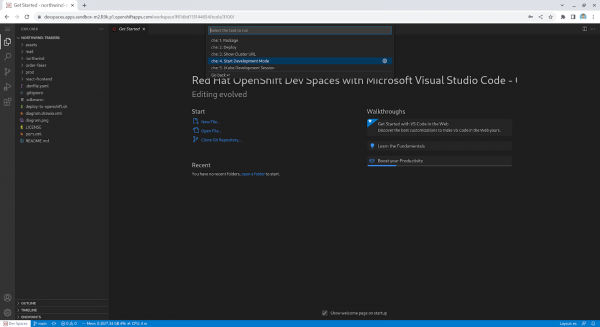
Figure 8: Continue by starting the Eclipse JKube remote development session. Figure 1: Continue by starting the Eclipse JKube remote development session.
Start an Eclipse JKube remote development session
Let's continue. Select
Terminal -> Run Task -> devfile -> 5. JKube Development Session(Figure 2).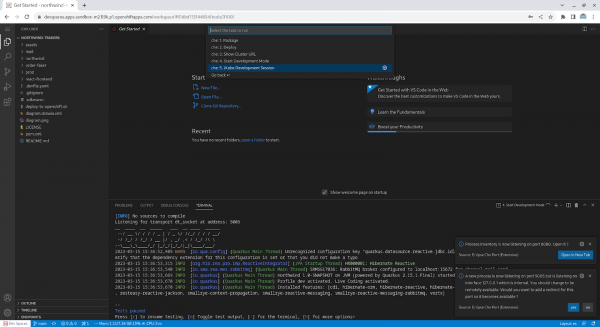
Figure 9: To start the session, click on Terminal -> Run Task -> devfile -> 5. JKube Development Session. Figure 2: To start the session, click on Terminal -> Run Task -> devfile -> 5. JKube Development Session. This will start the JKube development session, allowing us to perform live changes on our application while being exposed to the rest of the microservices (Figure 3). Once the session is ready, the terminal should show the following messages:

Figure 10: What your terminal output should look like once the session is ready. Figure 3: To start the session, click on Terminal -> Run Task -> devfile -> 5. JKube Development Session.
Now that everything is ready, we can continue by performing modifications to the application.
Live-code the Northwind component
Let’s start by changing the MailService Java class to change the subject of the email notification.
Open the file on the editor and replace the line where the subject is set, to the following:
```

final String subject = "Order " + orderId + " must be shipped as soon as possible";

```
Open the application from your cluster by selecting Open URL (Figure 4).
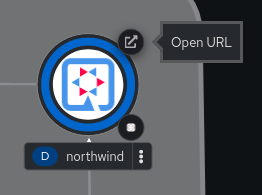
Figure 4: Select Open URL to open the application from your cluster. You should now be able to see the application interface.
Click on the email icon to send an order to the warehouse. Your local application should now interact with the other services in the cluster, and the email subject should contain the changes we made (Figure 5). You can check the email by visiting: https://www.mailinator.com/v4/public/inboxes.jsp?to=northwind-warehouse.

Figure 12: Click on the email icon to send an order to the warehouse. Figure 5: Click on the email icon to send an order to the warehouse. We can also make changes on the dashboard's front end. Let’s open the
app.mjsfile in the IDE and change the application title to:``` <h1 className='text-lg font-bold text-gray-800'> Northwind traders from OpenShift Dev Spaces </h1> ```Refresh the dashboard and the changes should be visible (Figure 6).
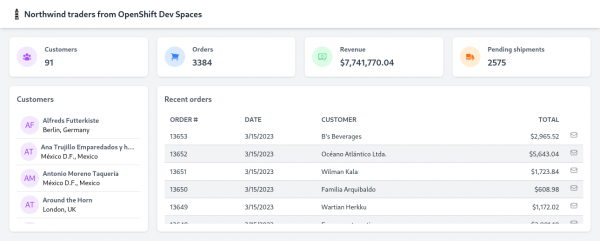
Figure 13: Refresh the dashboard and the changes should be visible. Figure 6: Refresh the dashboard and the changes should be visible.
Stop the development sessions
Once you’re happy with the changes, stop the Quarkus and Eclipse JKube development sessions. Everything should go back to normal.
We do this by selecting Ctrl+C in the terminals we started. If you want to remove the application from the cluster and clean up the resources in the user namespace after the exercise, execute:
Terminal -> Run Task -> devfile -> 6. Clean Up.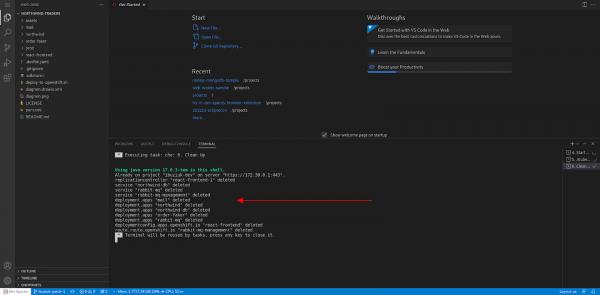
Summary
Congratulations. Now you know how to build and deploy a Quarkus application to Red Hat OpenShift.
OpenShift Dev Spaces and JKube provide developers with powerful tools to quickly and easily develop, deploy, and update microservice applications. By leveraging the power of OpenShift Dev Spaces and JKube, developers can streamline the development process and deliver applications with fewer errors and less downtime.
Not done learning yet? Try one of these Red Hat OpenShift learning paths.
