Creating a MySQL database in Red Hat OpenShift is useful for developers, there's no doubt about that. But, once the database is ready, with tables and data, how do you use the data in your application? Is there some special magic when using Red Hat OpenShift? What about the fact that pod names can change? This article will walk you through the steps necessary to access a MySQL database that is running in your OpenShift cluster.
There is code
The code to accompany this blog post is available at the associated GitHub repo.
Let's get a database
The first step — after creating an OpenShift cluster — is to create a MySQL database in OpenShift. My previous article describes how to create an ephemeral MySQL database in your OpenShift cluster. For the sake of this article, we make the following assumptions:
- The cluster name is mysql.
- The project name is mysqsl-test.
- The database name is sampledb.
If you change any of these values, you'll need to change commands and scripts as necessary.
Database up and running
By following the previous article, you will now have a database up and running in OpenShift. In that article, we named the MySQL database instance mysql. This is important; if you used a different name, make note of it, as we'll need it soon.
The services
For this demo, we're going to run two very simple microservices, getCustomer and getCustomerSummaryList, in pods in our OpenShift cluster. The source code for these services exists in a directory in a GitHub repo (mentioned previously), so rather than create an image on our local machine and push it to our cluster, we'll use OpenShift's slick Source-to-Image (or S2I) build feature.
The S2I feature allows you to reference a GitHub repo in OpenShift and trigger automatic builds from source. OpenShift will fetch the source code, analyze it, and build it according to what type of source code it is (e.g., Node.js, Ruby, etc.). The resulting image will be stored in the OpenShift cluster's internal registry.
You can optionally configure your GitHub repo to post a webhook to your OpenShift cluster whenever a pull request is approved, triggering a rebuild of the OpenShift-hosted image.
To build our microservices from source, we'll use the following commands.
Note: You need to alter the MYSQL_USER and MYSQL_PASSWORD values to match the credentials that were supplied when you created the database (in the previous article). If you don't have those values, you'll need to add a user with the proper rights to your MySQL instance.
oc new-app https://github.com/redhat-developer-demos/mysql-openshift-ephemeral.git --context-dir=src/getCustomer --name getcustomer -e MYSQL_HOST=mysql -e MYSQL_DATABASE=sampledb -e MYSQL_USER=mysql_userid_goes_here -e MYSQL_PASSWORD=mysql_password_goes_here
oc new-app https://github.com/redhat-developer-demos/mysql-openshift-ephemeral.git --context-dir=src/getCustomerSummaryList --name getcustomersummarylist -e MYSQL_HOST=mysql -e MYSQL_DATABASE=sampledb -e MYSQL_USER=mysql_userid_goes_here -e MYSQL_PASSWORD=mysql_password_goes_here
These two commands will launch builds inside your OpenShift cluster that should take about a minute. If you run oc get pods, you can see them running. When they're finished, we have to services running in our OpenShift cluster. They are not reachable from outside the cluster; this is by design. We're going to add a website to the cluster as well. That website will use these two services, and we'll expose the website to the world via a public IP address and URL.
The website
To create the website, we'll use a different method. Rather than use source code, we'll pull a Linux image into OpenShift. The following command will pull the image into the OpenShift cluster's internal image registry and start it.
oc new-app --name mvccustomer --docker-image=quay.io/donschenck/mvccustomer:latest -e GET_CUSTOMER_SUMMARY_LIST_URI="http://getcustomersummarylist:8080/customers" -e GET_CUSTOMER_URI="http://getcustomer:8080/customer"
Note that we're supplying environment variables that define the path, inside OpenShift, to the two services we just built.
There's one more small step. We need to expose this website to the world so can browse to it from our desktop browser. We do that, and create a "route" in OpenShift, by using the following command:
oc expose service mvccustomer --insecure-skip-tls-verify=false
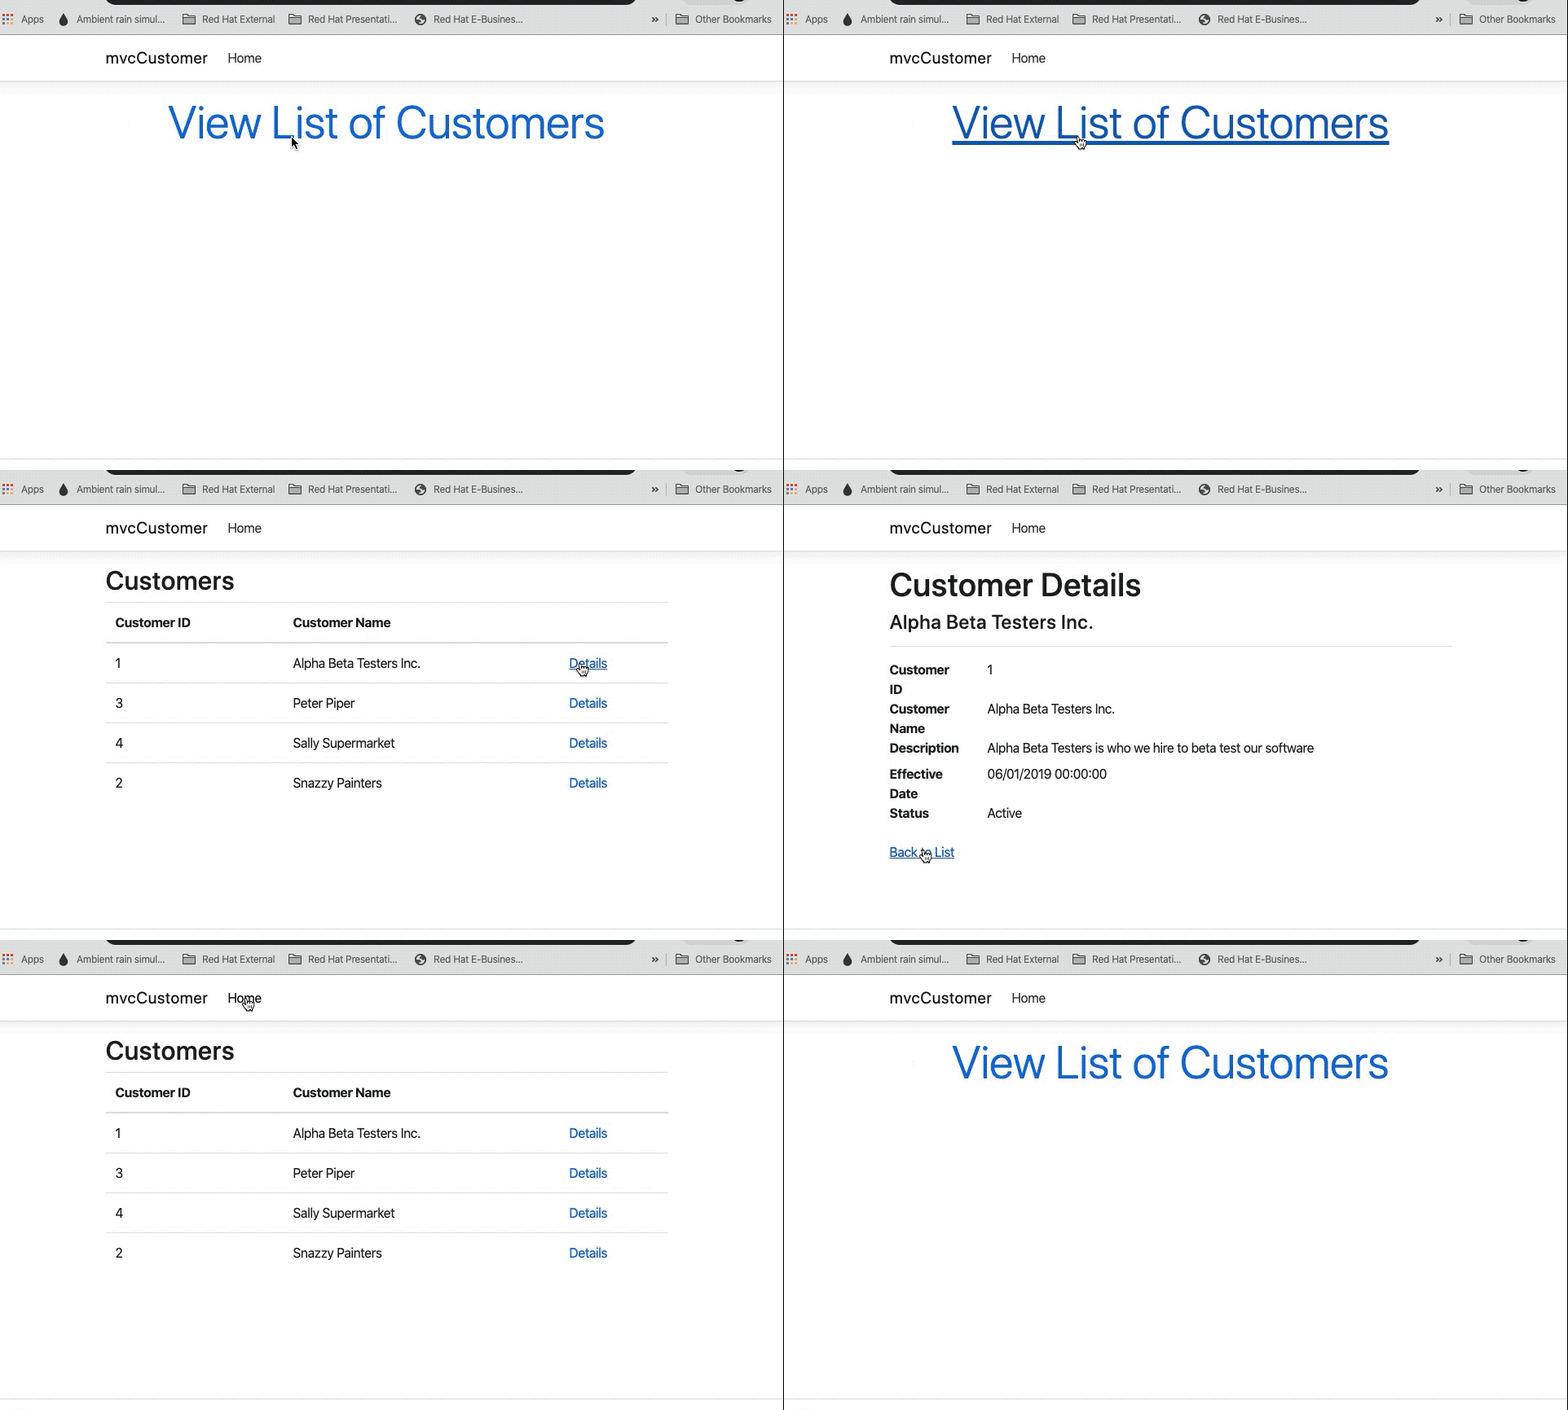
At this point, you have two microservices that will retrieve a customer list and a single customer from your MySQL database, running in OpenShift — as is our ephemeral MySQL database. We also have a website that uses these two services. We can see the URL for our website by running the following command:
oc get routes
Looking at the URI, you can see the obvious parts that refer to my service, my project, my cluster, and my domain. The URI format is as follows:
http://{service_name}-{project-name}.app.{cluster_name}.{domain_name}Remember when I mentioned, in the "Let's get a database" section above, how we assumed some names? Well, if you did decide to change things up, you would notice it here.
Discovery
This idea, that you can know ahead of time what the URI will be, is thanks to Kubernetes' feature known as "Service Discovery." Because you assign a name to service, Kubernetes will keep track of the pods associated with it, even if the pod names change (e.g., a pod is deleted and replaced by a new pod). Even better: As you scale up to multiple pods, you still have only one URI. Kubernetes takes care of the load balancing between the pods.
Launching the website
Simply paste the URL into your browser and start clicking.

What's next?
The next step is to create a permanent (i.e., not ephemeral) MySQL instance running in Red Hat OpenShift. That's yet another article.
Last updated: July 1, 2020