Page
Modernize the application

One of the critical strengths of this approach is that we can now run VMs under the control and exposed by OpenShift. This means that you can lift and shift your existing VMs today into OpenShift, and they will run exactly as they did before. The only difference is the way in which the traffic can be exposed. There is also a technology called Multus which allows you to mount external network interfaces (NICs) into the VMs directly, allowing the VMs network access to externalized networks not visible to OpenShift.
This is powerful because once you have a legacy application running as a VM within OpenShift, and have exposed it using the OpenShift Services, it is incredibly easy to modernize and expose the new version without impacting the current users.
In order to get full benefit from taking this lesson, you need to:
- Access the Developer Sandbox.
In this lesson, you will:
- Create a modern version of the application.
- Create a container-based
httpserver. - Shift traffic from your VM to a new container.
Create a modern version
In the Developer Sandbox UX, switch to the Developer viewpoint by selecting Administrator at the top left, then selecting Developer.
In the Developer topology, note that the VM is represented by a VM icon. We can interrogate and examine it by clicking on it, which gives us a neat little content panel on the right with details.
Click +Add, then All Services. In the Filter by Keyword box, enter "http server". Select the Builder Images Apache HTTP Server (httpd) tile. When the content page appears, click Create.
When the dialog panel appears, enter the following into the fields as shown in Figure 1:
- GitHub repo URL:
https://github.com/sclorg/httpd-ex.git - Context dir:
/modern
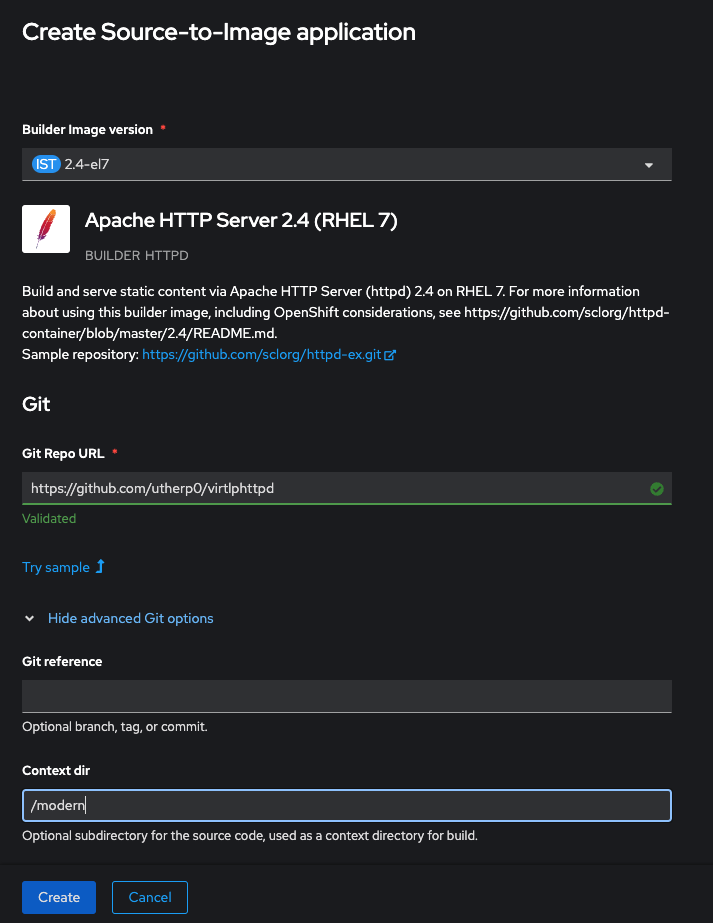
Scroll down and change the Resource Type to Deployment. Select Create.
Once it has finished building and the roundel in the Topology has changed to dark blue, click the Route icon as shown below to test that the modern page appears in a tab (Figure 2).
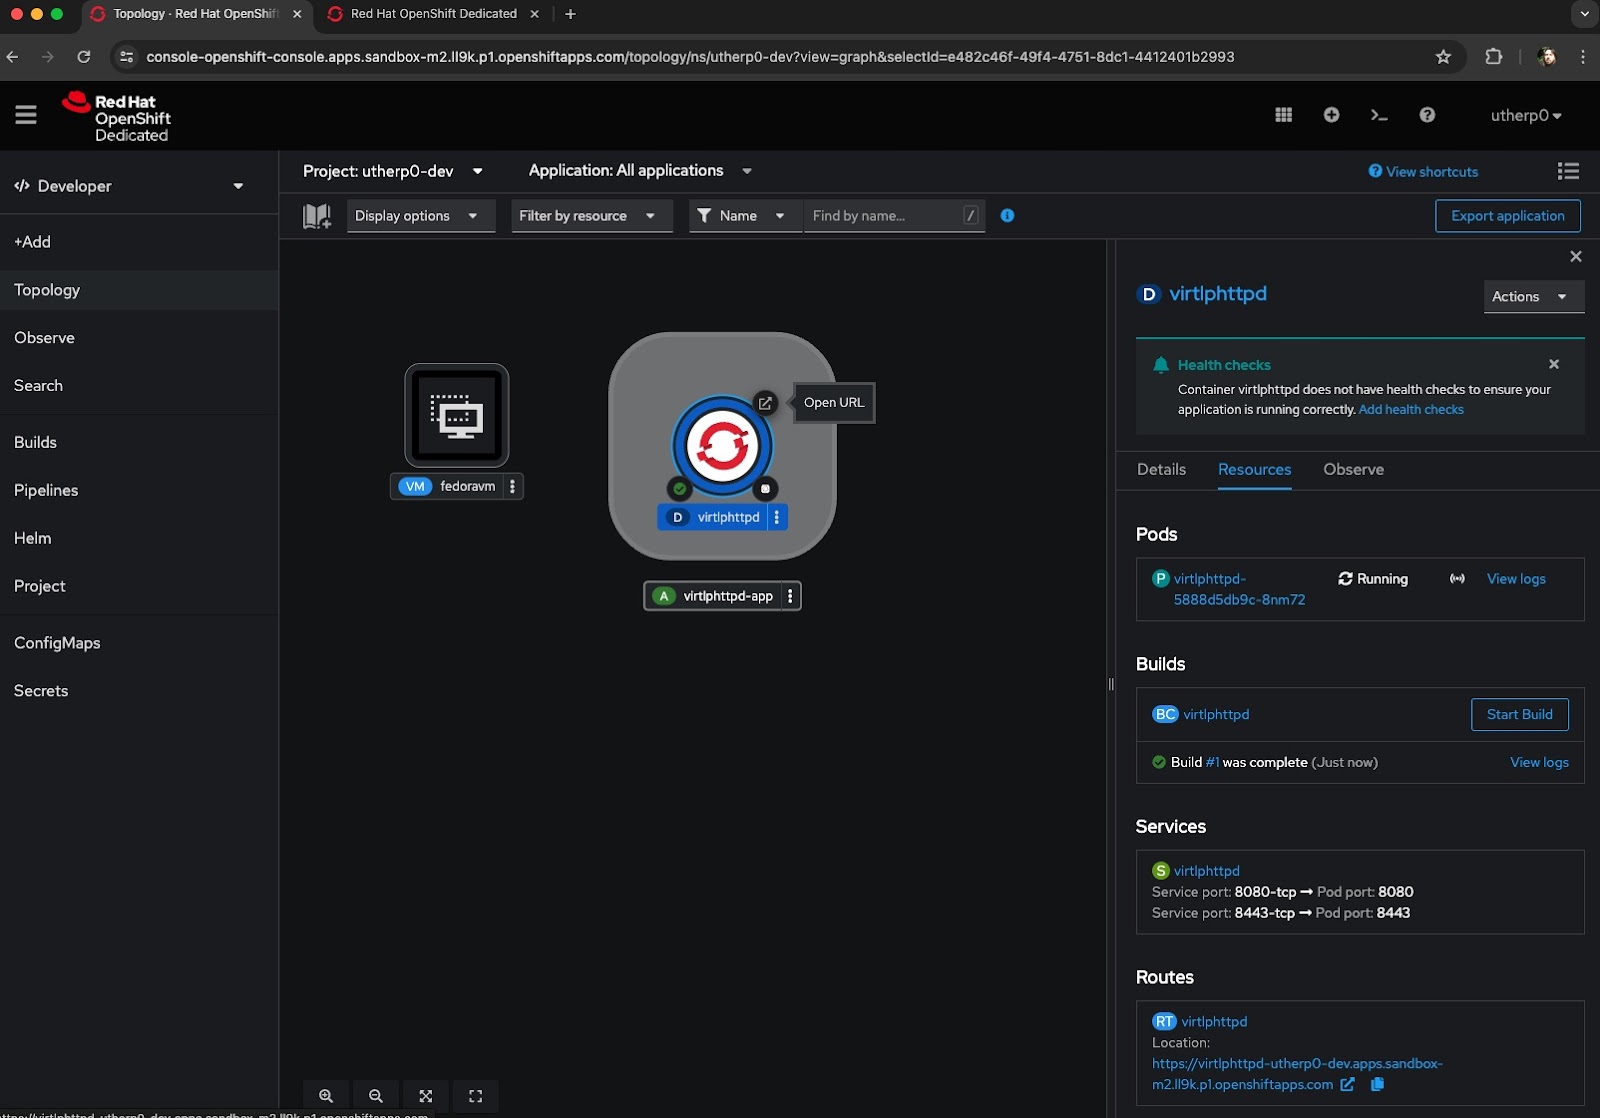
We now have a modern version of our application running in a container. What we will do now is redirect the traffic from the VM to the container by changing the route we created for the original legacy application.
Switch back to the Administrator viewpoint. Click Networking then Services. You will see we now have two services: one for the legacy (fedorahttp), and a new one for the containerized version (virtlphtttp).
Now click Routes. What we are going to do is change the specification of the route for the original. Effectively, we will have the same URL, but instead of directing traffic to the VM, it will direct traffic to the modern container version.
Click the fedorahttpexternal route. Click YAML and replace everything in the spec: component but leave the host: entry with the following:
spec:
 host: LEAVE YOUR HOST ENTRY AS IS
 to:
   kind: Service
   name: virtlphttpd
   weight: 100
 port:
   targetPort: 8080-tcp
 tls:
   termination: edge
   insecureEdgeTerminationPolicy: Redirect
 wildcardPolicy: None
Now click Save. The original route should now point to the modern version. Click Routes in the left-hand navigation panel, then the location field for the fedorahttpexternal route. If all is well, you will see the modern content page.
So, what have we accomplished?
If you go to the Developer viewpoint and look at the topology, we now have both an active VM and a pod running the application. We have created, from scratch, a Fedora VM, which is now running happily on the Developer Sandbox. We have also demonstrated how easy it is to recreate/move the application to a container, and the simplicity of rewiring the existing route. End consumers will see no change, other than they now see the modern content, meaning that you can migrate your applications from VMs both easily and in your own time.
Running a VM on OpenShift is, under the covers, exactly the same technology as other VM systems. The only difference is that instead of having a control application/plane (think vCenter or RHV-M), every VM has a small controller pod.
Before we finish, head back to the Administrator viewpoint. Click Workloads then Pods. Look at the pods that are in a running status. The pod whose name starts with virt-launcher- is the pod controlling your VM.
Now click Storage then PersistentVolumeClaims. You will see a PVC titled fedoravm. That is your VM file system.
There’s a lot more to the functionality available for VMs running on OpenShift. With the appropriate storage type, you can:
- Do live migration from worker node to worker node.
- Take temporal snapshots.
- Restore the state of your VMs.
- Build templates.
This helps users create instances of VMs that are strictly controlled in terms of their resources. On top of that, because the entry and control points for the VMs are actually in an OpenShift pod, you get all the advantages of OpenShift, which include role-based access control (RBAC), strict network control, failover, and disaster recovery (DR) with OpenShift Disaster Recovery.
Hopefully, this learning path has demystified the concepts of VMs on OpenShift and given you food for thought on just what you can do with them.
Ready to learn more about OpenShift? Try the Foundations of OpenShift learning path.
