Page
Set up a legacy application

Now we are going to actually run an application on the VM and expose it for use as a standard service and route through Red Hat OpenShift. In plain English, this means we will be able to directly access the application, in this case a web server, from the outside world and, more importantly, via a standard OpenShift/Kubernetes service object. This is extremely important, as you will see when we modernize the application into a container as part of this exercise.
In order to get full benefit from taking this lesson, you need to:
- Access the Developer Sandbox.
In this lesson, you will:
- Log in to the Developer Sandbox.
- Add a webserver application.
- Expose an application.
- Create a service.
- Create a secure route.
We will now be working directly within the VM itself. Due to the nature of the Virtual Network Computing (VNC) console, which can only exist with a single view, we will need to open the VNC externally and change the view on the OpenShift UX. The Overview page does a refresh of the VM details periodically and, if active, will pull the VNC context.
On the VM Overview page, click Open Web Console. This will open a tab in your browser and render the VNC console in full size. While the console is rendering, switch back to the OpenShift UX and click the Metrics tab of the VM overview to stop pulling the VNC context and disconnecting the VNC tab.
In the VNC tab, you will have a familiar log-on prompt if you have used Fedora before. If you remember, we added a user (fedora) with a very unsafe password (password). Click in the VNC window so it has focus and log in to the VM using fedora and password.
Now we are going to add a webserver application to our Fedora box. Enter the following commands:
sudo dnf install httpdYou are asking the system to install the httpd components, such as admin and using sudo. It will check the repositories and ask for confirmation on the installation a couple of times. Select Y when prompted and enter the following commands:
sudo systemctl enable httpd
sudo systemctl start httpd
These commands add the httpd server to the startup processes of the VM, and start the httpd service running. You can check to see if it’s running by entering:
sudo systemctl status httpd
curl http://localhost
You should see the systemctl command reporting the service is active, and the textual output of the http server when you have no files to serve.
We are now going to add an HTML file from a GitHub repository as our legacy content. Enter the following commands in the VM VNC console:
mkdir /home/fedora/git
cd /home/fedora/git
sudo dnf install git
git clone https://github.com/utherp0/virtlphttpd
cd virtlphttpd
sudo cp legacy/index.html /var/www/html/
curl http://localhost
We are installing the GitHub functionality into our VM and cloning a repository. We are then copying the legacy index.html into the httpd content directory, and when you cURL the localhost, you will get the legacy webpage.
Expose the legacy application
So we now have a running Fedora VM in our project. What we are going to do now is set up the OpenShift/Kubernetes components to expose the application. In actuality, we are going to create a service object that exposes the 80 port into the VM from the internal Software Defined Network (SDN). This is incredibly powerful. We are using the routing technology of OpenShift, designed for containerized workloads, to expose running applications hosted by a controlled VM. This abstraction will allow us to transition the application to a container, which is invisible to the end user.
In order to set up a service endpoint, we need what is called a selector. This is the way the internal SDN routes traffic. To do this, we will need to have a hook of sorts in the VM, which we will do by adding a label that can be referenced by OpenShift itself.
Close down the VNC tab for now. You can recreate it easily from the VM Overview tab.
Switch back to the VM Overview tab. In the left-hand navigation pane, select VirtualMachines to list your active VMs. In this case, we have one VM called fedoravm.
Click fedoravm and the Overview page will appear. We are going to change the actual specification of the VM itself, so click the YAML tab.
We are going to add a label to the specification of the VM template. We will add a label whenever a VM is created. In the YAML, scroll down until you find the template definition, which will look like Figure 1.
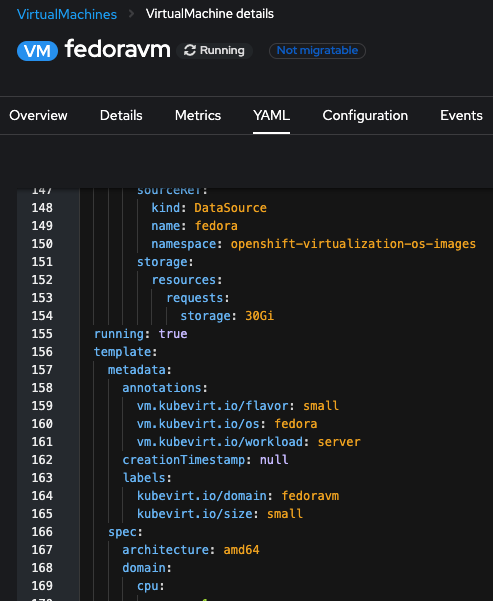
Notice how labels define the domain (fedoravm) and the size (small). Add an additional label after the vm.kubevirt.io/size at the same indentation (Figure 2):
special : myfedoravm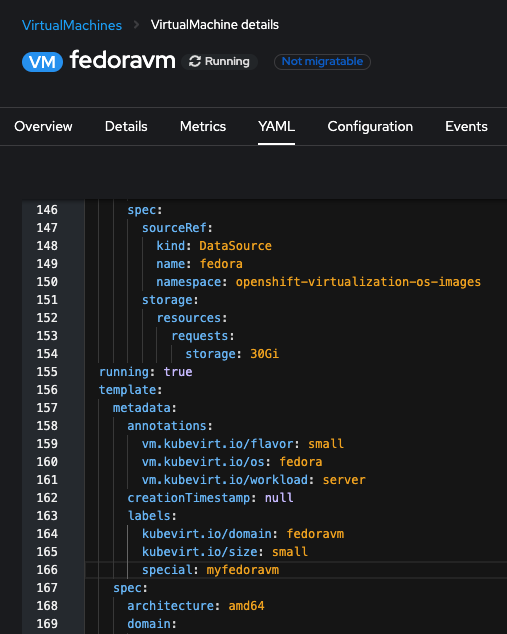
Remember to select Save when you add the label. Also be aware that the YAML will auto-refresh periodically, which is a side effect of the OpenShift/Kubernetes reconciliation loop. This auto-refresh may remove your changes if you haven’t saved them.
We will use this special label as the selector for the service to route traffic into the VM. We have changed the specification, but the label hasn’t been applied yet. This is because the specification is only applied when the VM is created or restarted.
Click VirtualMachines in the left-hand navigation then click the kebab (the three vertical dot icon on the far right side of the VM entry) and select Restart (Figure 3).
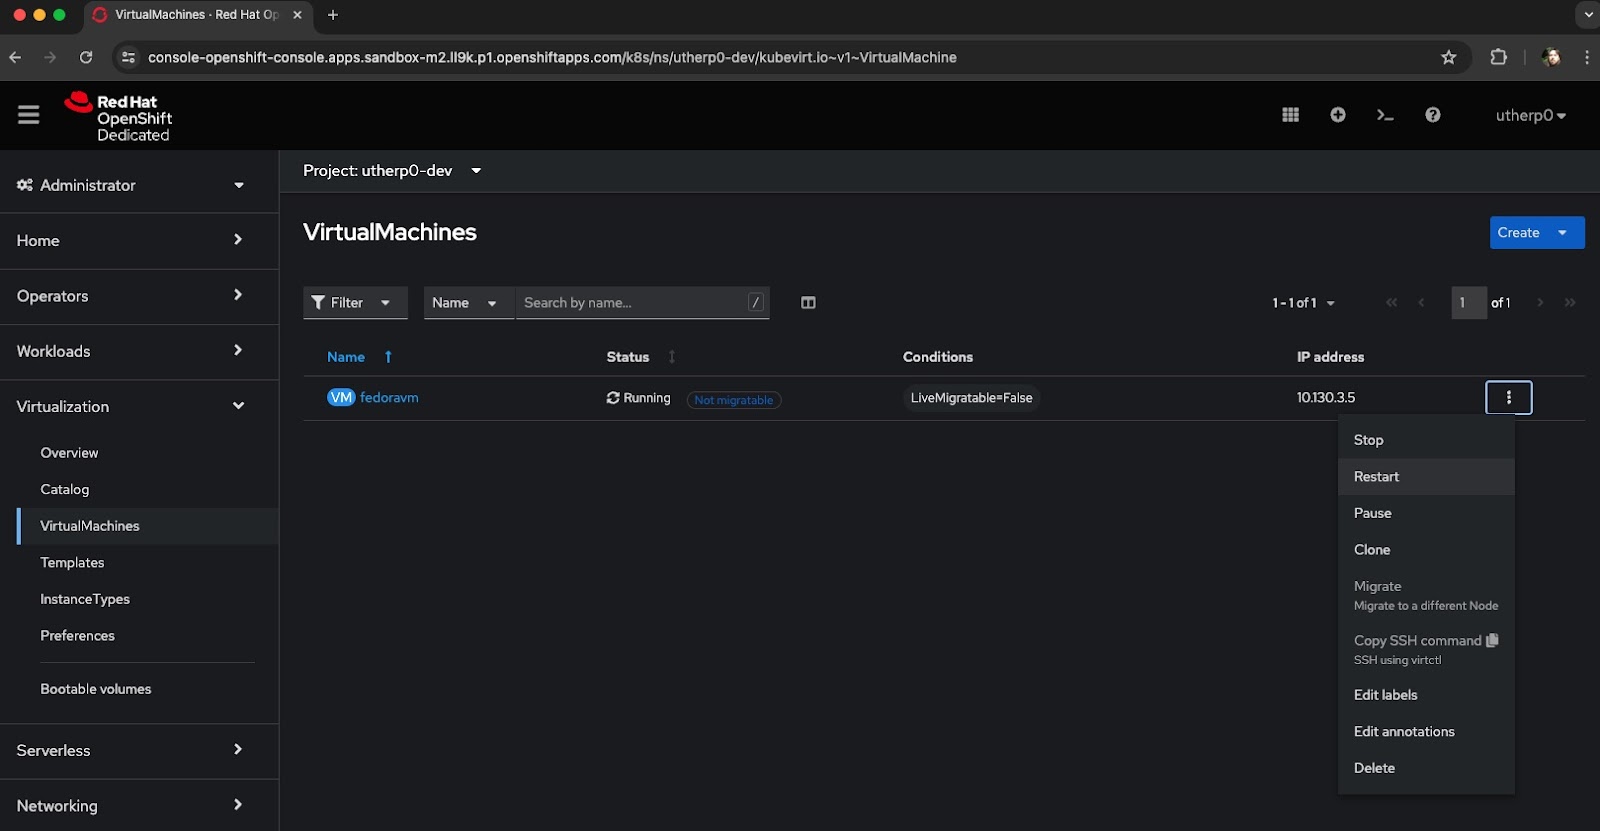
The VM will cycle off and on. Wait until the status changes back to Running then select fedoravm again to get the overview.
Add a service
Now we are going to add a service to ingress traffic into the 80 port running on the VM. Select Networking from the left-hand navigation, then click Services.
Click Create Service. You will be given a YAML editor with a basic service definition. Replace all of the contents in the YAML editor with the following code:
apiVersion: v1
Kind: Service
metadata:
  name: fedorahttp
spec:
  selector:
    special: myfedoravm
  ports:
protocol: TCP
port: 80
targetPort: 80
Once you have entered the code, it should look exactly as shown in the image below (Figure 4).

Click Create.
What we have done is create a service that will ingress traffic directly into the VM on port 80. To test this out, click VirtualMachines, then click fedoravm, and open the VNC console.
Note: Remember to come back to the OpenShift UX and change the tab in the overview to metrics to avoid it pulling context back from the VNC console.
Enter the following commands:
sudo systemctl status httpd
curl http://localhost
curl http://fedorahttp
The first command will hopefully tell us the httpd service is still active. Remember that we restarted it to enable the label, but we added the systemctl enable to make sure the system started the httpd as part of its startup process.
The interesting command is the third one. We are directly referencing the name of the service we created. By adding it as an OpenShift service, we can refer to it by name, it is directly DNS-resolvable, and it filters the traffic into the VM appropriately. We did this from within the VM, showing the VM has DNS access to named services. In fact, if you create two VMs and expose their services, you can talk directly between them using the named services as endpoints as long as they are within the same OpenShift project.
We will now expose that service and the service endpoint (not the VM) to the outside world. Click Networking in the left-hand tab, then choose Routes.
Click Create Route.
Change the name to fedorahttpexternal. In the service pulldown menu, select the service we created (fedorahttp), then select 80->80 (TCP) in the Target Port. We can only select one target port because we have only exposed the 80 port.
Make sure the Secure Route checkbox is set, then select Create.
This will create a route object which provides an external fully qualified domain name (FQDN). The output will look like Figure 5.
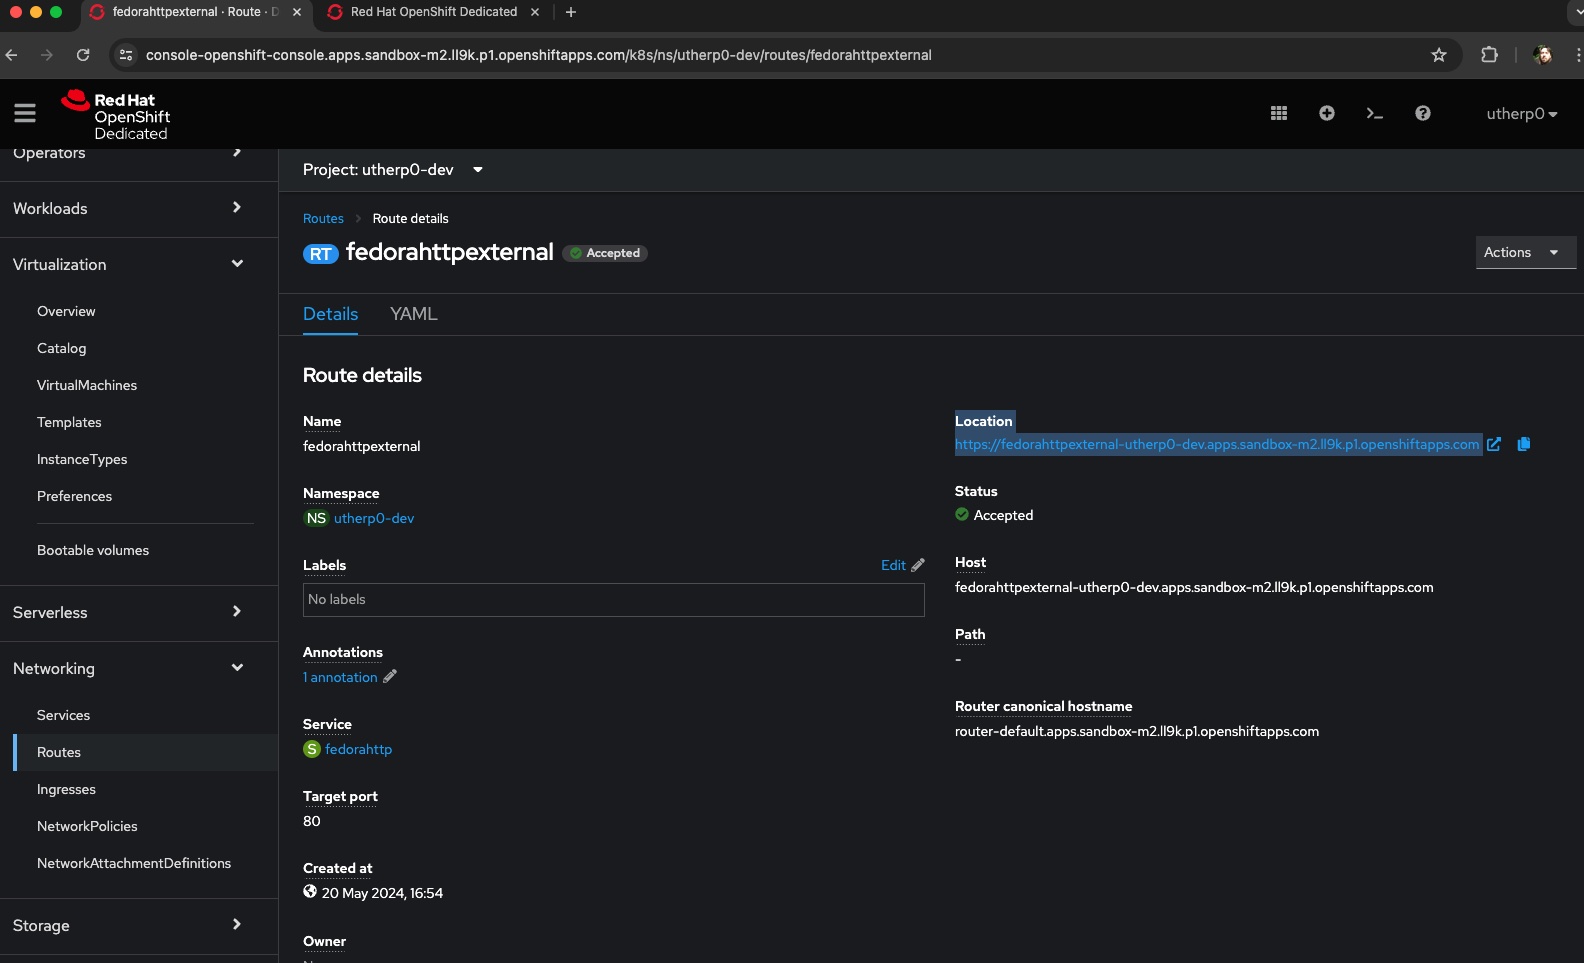
Note the highlighted components. Next to the highlighted component, which will be different for your Developer Sandbox, is an icon that shows a box with an arrow in it. This icon is a direct link to the route.
Click the icon. The legacy HTML page will appear in a new tab. This page is being served by the http server running in your VM, but reachable by a standalone URL served by OpenShift.
Summary
Congratulations. We created a route. This abstracts the external user from the internal endpoint. Remember that the route we created currently ingresses traffic into port 80 on the VM.
In the next lesson, we will create a modern version of the application, a container-based http server, and then shift the traffic from our VM to the new container without changing the external endpoint.
